

How To Do Gradients In Procreate
Although Procreate doesn't come with any tools or features that directly allow you lot to create gradients, that doesn't mean it can't be done manually. It also doesn't mean that it tin't be done with ease either. The luminescence in Procreate's simplicity will be on full display for today'south tutorial as we go over how to make a slope in Procreate using a manual method.
In short, the manner that you tin can make a slope in Procreate is by filling dissever layers with the colors you'd like used in the gradient, then blurring them together using the Gaussian Blur outcome. This may sound like a convoluted procedure, but I can assure you it'southward not. It takes mere seconds to generate various types of gradients. In this tutorial I'll exist demonstrating how to do so for both linear and radial gradients.
How To Make A Slope In Procreate
To brand a gradient in Procreate, create separate layers that are filled with the colors y'all'd like used in your gradient. Then, alloy them together using the Gaussian Mistiness effect and merge the layers together.
The following video tutorial will walk you through the procedure of creating a linear gradient using Procreate. I too demonstrate how to fill a text object with that slope, so check it out if you're looking for a practical application for the gradients you'll exist creating:
Go along on for the written instructions.
Make A Linear Slope In Procreate
Outset, permit's go over how to make the simplest type of gradient there is, which would be a linear slope.
A linear gradient is a slope that blends two colors together following a single straight (or "linear") path.
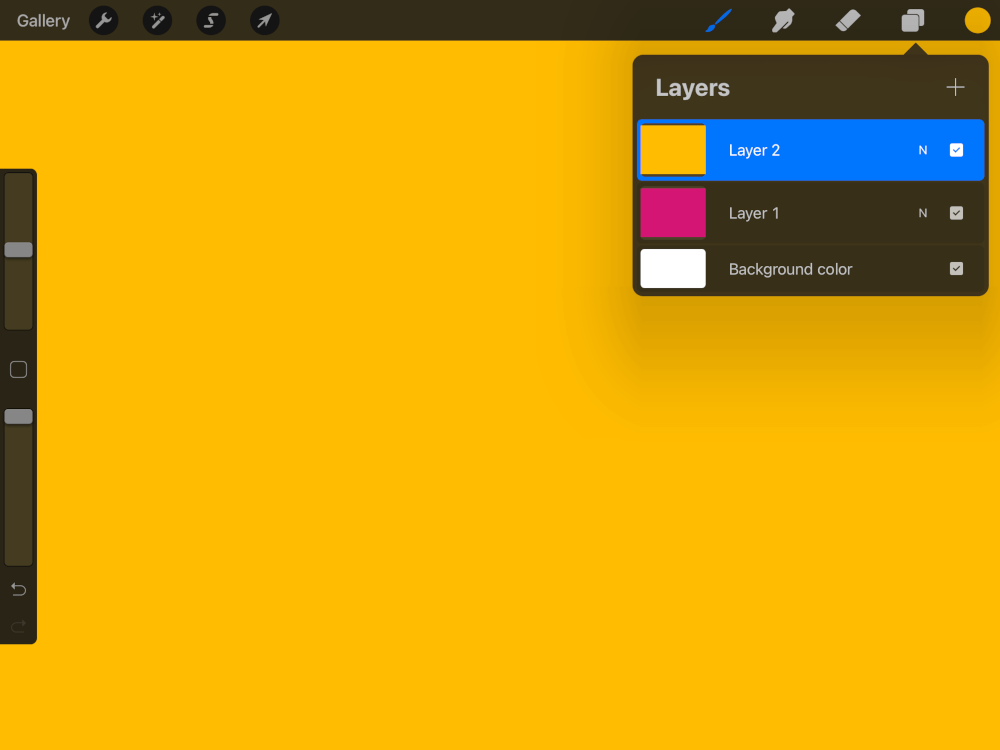
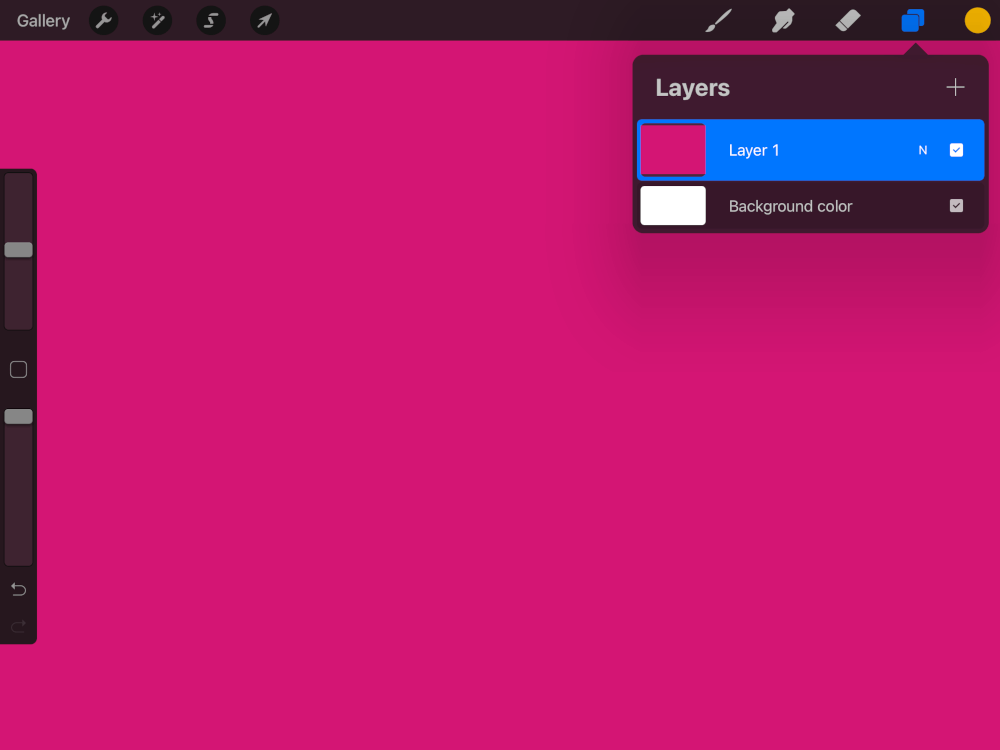
Pace one: Create split layers and fill each with the colors you'd like to use
The starting time step in making a linear gradient is to create two separate layers and make full each of the with the color you lot'd like used in your gradient.
For example, I'll be making a gradient that transitions from pink to xanthous, so I've created 2 separate layers, filled one with pink and the other with yellow:
Y'all can fill up your layers by simply clicking and dragging the color disc onto the canvas. Delight refer to the video tutorial if you need a more than elaborate explanation of how to do and then.
Step 2: Move one of the layers over and utilise a full Gaussian Blur to it
Side by side, we're going to apply the Movement Tool to motion the top layer over:
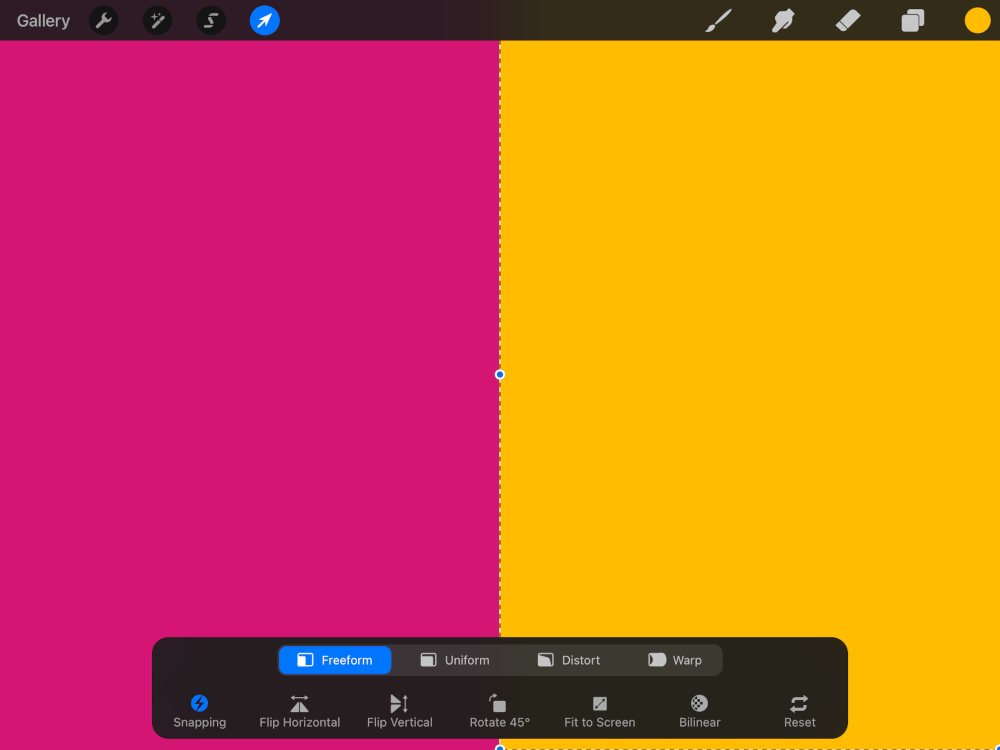
This placement will determine the direction of your gradient as well as the position of the colors in that gradient. So, move your layer to the top or bottom one-half of the screen if you'd like the gradient to follow a vertical path. Motility it to the left or right half of the screen if you'd like information technology to follow a vertical path.
It is recommended that you enable snapping while moving your layers. This will ensure that you position your layer exactly halfway beyond the sail, and without losing its position of the vertical or horizontal axis.
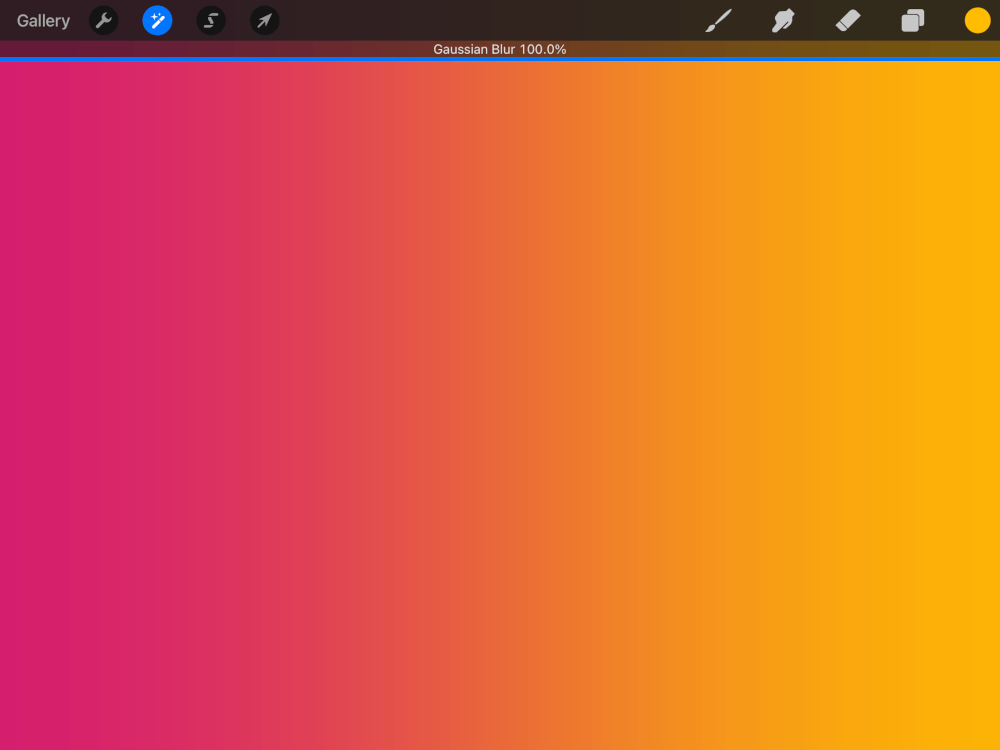
With the top layer still activated, apply a Gaussian Blur, which tin exist located in the Effects menu.
Make sure to choose the apply the blur to the Layer (rather than the pencil) when prompted. And then, tap and drag all the way across your screen, from left to right, to blur the top layer. This will effectively create a slope from your two colors:
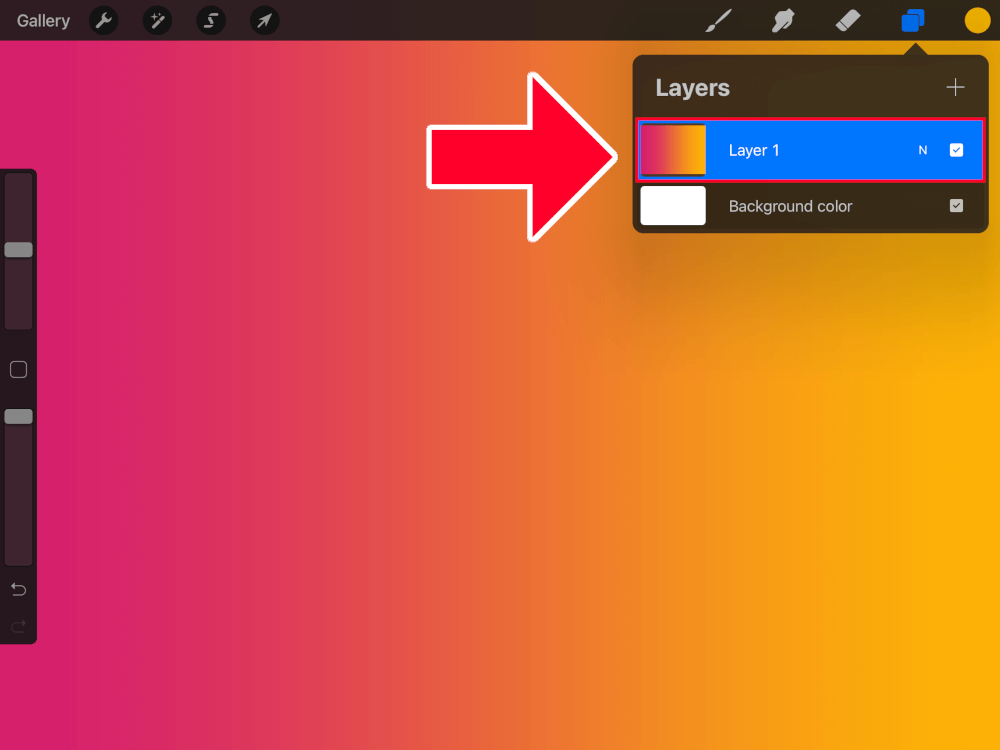
Step three: Merge both layers together, resulting in a linear gradient
If you're trying to make a gradient in Procreate and so information technology'southward safe to assume that you would probably like to apply that gradient to fill other objects with. In society to do so, you lot'll have to merge the two layers together first.
Open the Layers menu, tap on the top layer until the flyout bill of fare populates, and select Merge Downwardly.
This will combine the two layers together, making them into a single usable gradient:
Brand A Radial Gradient In Procreate
Another type of gradient that you can brand in Procreate is a radial gradient.
Unlike a linear slope, which follows a straight path, a radial slope follows a round path. Let's go over how to make a radial gradient in Procreate.
Step 1: Create a new layer and fill it with ane of the colors you'd similar used in the gradient
Showtime, create a new layer and fill information technology with the outer most color yous'd similar used in your radial slope.
For this sit-in I will exist making the exterior of the slope pinkish and the inside xanthous, and then I'll exist filling this layer with pink:
Step 2: Create a new layer with an ellipse choice that is filled with the other color
Next, add a new layer on top of the previous layer and utilise the Selection Tool to create an ellipse pick in the eye of your canvas:
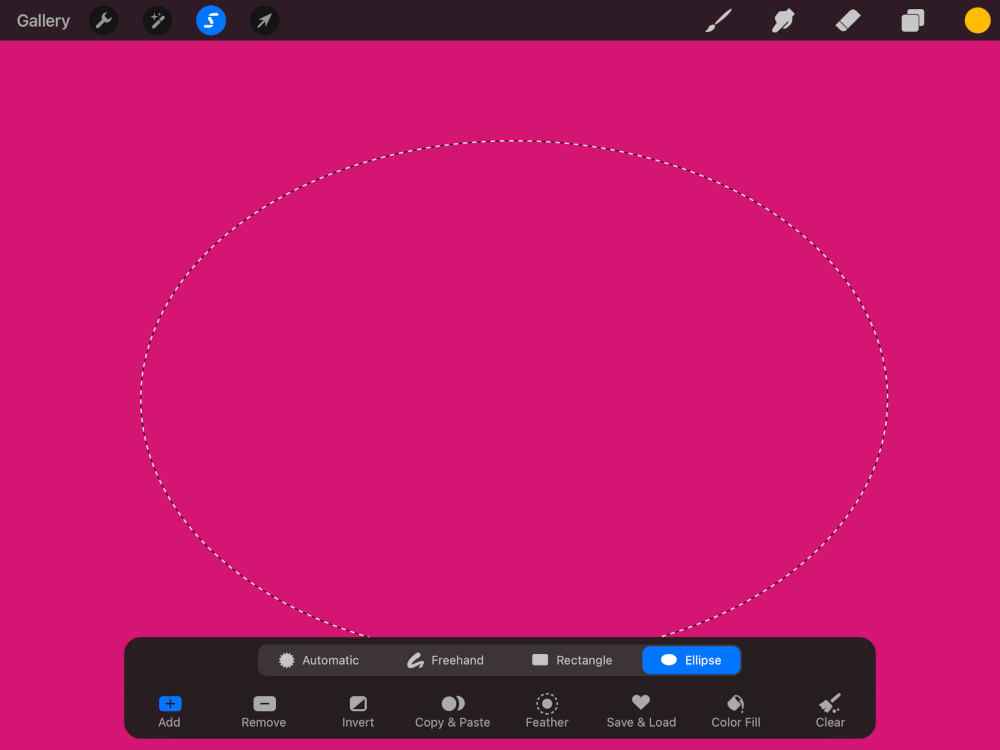
Fill that ellipse pick with the inner most colour you lot'd similar used in your radial gradient. In my case, that would exist yellow:

In one case completed, you may have to align the ellipse to the center of the page using the move tool with snapping enabled.
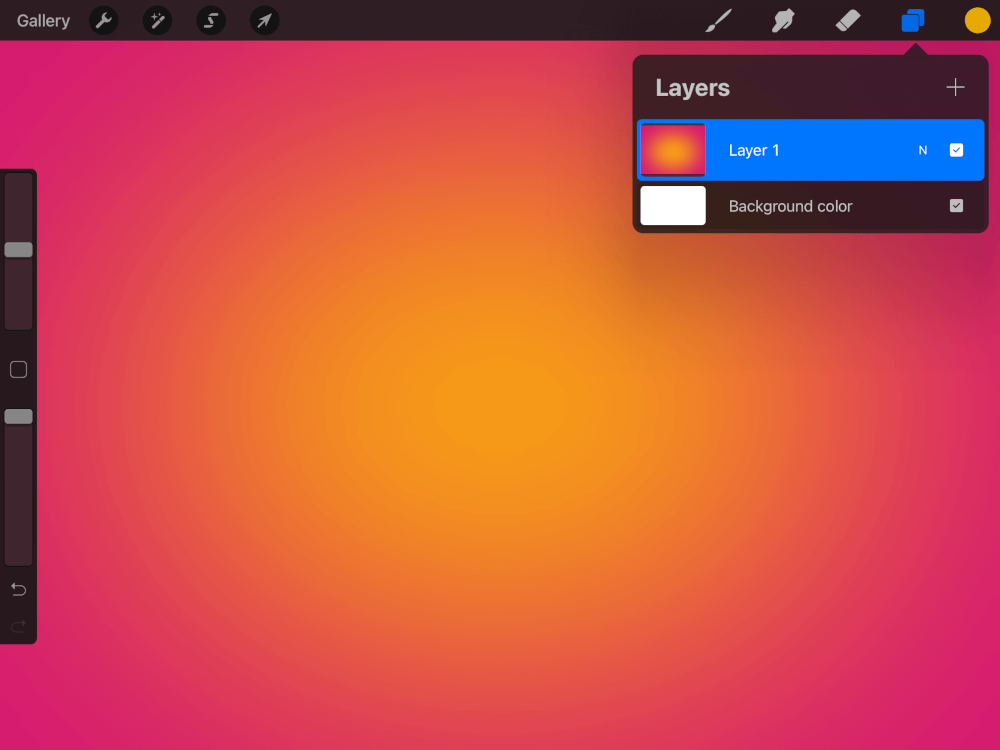
Pace 3: Apply a Gaussian Mistiness to the ellipse layer
Much like nosotros did for the linear gradient, we will exist applying a Gaussian Blur to the layer with the ellipse on it.
With that top layer withal activated, open the Gaussian Blur effect, located in the Effects bill of fare. When prompted, make sure to choose to apply it to the Layer rather than the pencil.
Tap and swipe from the left side of your screen to the correct in order to apply a full mistiness. This volition substantially make a gradient from the two layers:

Step 4: Merge both layers together, resulting in a radial slope
This last step in our quest to make a gradient in Procreate is to simply merge the two layers together and so that we will exist left with a single usable gradient layer.
To practice so, open the Layers menu and tap on the pinnacle layer until y'all get the flyout menu. And so, select Merge Downward.
This volition combine your two layers together, resulting in a usable slope:
Refer to the video tutorial at the offset of the post if you'd similar to know how to fill objects (such every bit text) with your gradient.
Conclusion
Before this yr when I made a review mail comparing Analogousness Designer vs Procreate, one of the things I criticized Procreate for was having an inability to create gradients. However, that's not entirely true. Every bit I've demonstrated in this tutorial, you tin can make a gradient in Procreate with relative ease if yous follow a transmission arroyo.
In a way, this only goes to show the luminescence in Procreate'south simplicity. Seeing how easy it is to manually create gradients sort of makes you question the need for a gradient tool in the showtime place, and this has been a common theme as I've connected to explore the program. On diverse occasions I've lamented not having a certain tool or feature, only to observe out that I never needed that characteristic in the first place. This has caused me to completely rethink what makes a great design awarding.
If y'all have any questions or need clarification on any of the steps taken in this tutorial, just leave a comment beneath.

Become A Master of Adobe Illustrator!
Desire to learn more about how Adobe Illustrator works? Check out my Illustrator Explainer Series - a comprehensive drove of over 100 videos where I go over every tool, feature and role and explain what it is, how it works, and why it'south useful.
Logos Past Nick LLC is a participant in the Amazon Services LLC Associates Program, an affiliate ad programme designed to provide a ways for sites to earn advert fees past advertising and linking to Amazon.com. As an Amazon Associate I earn from qualifying purchases. Read affiliate disclosure here.
Source: https://logosbynick.com/make-a-gradient-in-procreate/
0 Response to "How To Do Gradients In Procreate"
Post a Comment